


Designer: Marina Dovgan
Source: www.vk.com/dovganknitting
You will need:
- Yarn: Himalaya Dolphin Baby or YarnArt Dolce
- 4.0 mm crochet hook
- 12 mm safety eyes
- Black embroidery floss for nose
- Fine yarn to sewing details together
- Yarn needles and scissors
- Fiberfill
- Buttons for decoration
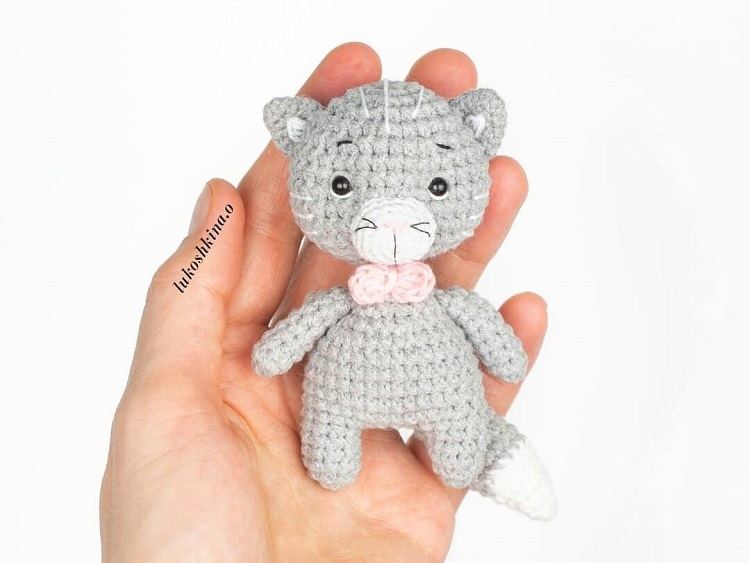
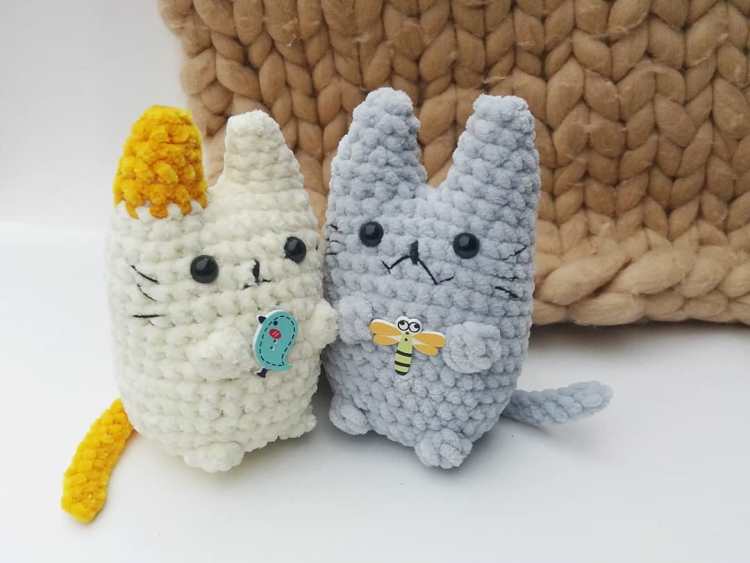
Crochet Hello Kitty amigurumi plush pattern

Abbreviations:
R – row
ch – chain
sc – single crochet
dc – double crochet
sl st – slip stitch
inc – increase (2 sc in one stitch)
dec – decrease (2 sc together)
BLO – back loop only
FLO – front loop only
[…] – number of stitches you should have at the end of the row
(…) – repeat whatever is between the brackets the given number of times
Arms (make 2)
With white yarn:
R 1: 2 ch, 6 sc in 2nd ch from hook [6]
R 2: (inc) repeat 6 times [12]
R 3: (3 sc, inc) repeat 3 times [15]
R 4: 15 sc
R 5: 13 sc, dec [14]
Switch to pink yarn:
R 6: 12 sc, dec [13]
R 7: 11 sc, dec [12]
R 8: 10 sc, dec [11]
R 9: 9 sc, dec [10]
R 10-12: 10 sc (3 rows)
Stuff only bottom of the arm.
Fold the top opening flat and 5 sc through both sides.
Fasten off.

Ears (make 2)
With white yarn:
R 1: 2 ch, 6 sc in 2nd ch from hook [6]
R 2: (1 sc, inc) repeat 3 times [9]
R 3: (2 sc, inc) repeat 3 times [12]
R 4: (3 sc, inc) repeat 3 times [15]
R 5: (4 sc, inc) repeat 3 times [18]
Fold the top opening flat and 9 sc through both sides.
Fasten off.

Legs, body and head (one piece)
Legs (make 2)
With purple yarn:
R 1: 2 ch, 8 sc in 2nd ch from hook [8]
R 2: (inc) repeat 8 times [16]
R 3: BLO 16 sc
R 4: 16 sc
Switch to white yarn:
R 5: BLO 16 sc
R 6-11: 16 sc (6 rows)
Cut yarn when you’ll finish the first leg.

Repeat Rows 1-11 for the second leg, but do not cut the yarn.
Continue on the second leg:
6 sc, 1 ch and go to the 1st leg:
R 12: 16 sc on the 1st leg, 1 sc in 1 ch, 16 sc on the 2nd leg, 1 sc in 1 ch [34]
R 13: 34 sc
Switch to pink yarn:
R 14: 8 sc, inc, 16 sc, inc, 8 sc [36]
R 15: BLO 36 sc
R 16-21: 36 sc (6 rows)
R 22: (4 sc, dec) repeat 6 times [30]
R 23: 30 sc
R 24: join arms: 3 sc, dec, (2 sc, dec, 2 sc together with 1st arm), 1 sc, dec, 3 sc, (3 sc, dec, 1 sc together with 2nd arm), 2 sc, dec [24]
R 25: (2 sc, dec) repeat 6 times [18]
Insert cotton bud(s) in the neck and in the head to make the neck more stable.
Stuff the neck firmly.

Continue crocheting the head.
Switch to white yarn:
R 26: (inc) repeat 18 times [36]
R 27: (5 sc, inc) repeat 6 times [42]
R 28: 3 sc, inc, (6 sc, inc) repeat 5 times, 3 sc [48]
R 29: (7 sc, inc) repeat 6 times [54]
R 30: 4 sc, inc, (8 sc, inc) repeat 5 times, 4 sc [60]
R 31: (9 sc, inc) repeat 6 times [66]
R 32-38: 66 sc (7 rows)
Insert safety eyes on R 35 at the distance of 8 stitches from each other.
R 39: (9 sc, dec) repeat 6 times [60]
R 40: 4 sc, dec, (8 sc, dec) repeat 5 times, 4 sc [54]
R 41: (7 sc, dec) repeat 6 times [48]
R 42: 3 sc, dec, (6 sc, dec) repeat 5 times, 3 sc [42]
R 43: (5 sc, dec) repeat 6 times [36]
R 44: 2 sc, dec, (4 sc, dec) repeat 5 times, 2 sc [30]
R 45: (3 sc, dec) repeat 6 times [24]
R 46: 1 sc, dec, (2 sc, dec) repeat 5 times, 1 sc [18]
R 47: (1 sc, dec) repeat 6 times [12]
R 48: (dec) repeat 6 times [6]
Fasten off.

Skirt
Attach pink yarn to a front loop of R 15.
R 1: FLO 2 ch, (1 dc, 2 dc in next st) repeat to the end of row, sl st
R 2: 2 ch, 2 dc in every st to the end of row, sl st
Switch to purple yarn:
R 3: 1 sc in every st to the end of row
Fasten off.

Flower
With yellow yarn:
R 1: 6 sc in magic ring
Switch to purple yarn:
R 2: (2 ch, 2 dc, 1 ch, sl st) repeat 6 times

I’m finding an error on row 31 as the row before you end with 66 stitches but the in row 32-38 says you have 60? Then when you dec. 6 times in row 39 you have 54 stitches? Also row 24 can’t be right either as the stitches don’t add up and the placement of the arms would be off? Otherwise I love the pattern. Just a little confusing.
Thank you, Gloria! Now it is correct. And you can sew arms on R 24 after you’ve finished the body.
Is row #24 corrected? 2 st not accounted for.
There should be 6 decreases and there is only 5?
Hi I’m a bit confused about R26.. it say to do 8 Inc and I should end up with 36 stitches but in R25 I’m at 18 stitches how does that work?
Bec, in R 26 do 18 inc.
Dziękuję pobrałam darmowy schemat, jestem fanką tych zabawek!!! Świetnie rozpisany wzór, a laleczki prześliczne. Jeszcze raz dziękuję. Ewa z Polski
How tall is the finished Hello Kitty?
I have no idea what a cotton bad is: this is in the instructions –
Insert cotton bad(s) in the neck and in the head to make the neck more stable.
Can you please explain
Sorry, cotton bud/buds (cotton swabs) is correct.
At what point do we stuff the head? How are the ears attached? Did I miss this in the directions?
I’m having a difficult time adding arms with direction. Each arm has 5 stitches across yet you have it as if there was 6. I might be reading it wrong but it just doesn’t seem to be uniform if I go based on instruction for r24. Help lol
You can sew the arms to the body later.
Hi,
What’s the final dimension ?
please help !!!I’m trying to make row 24 of the body and I don’t get 24 stitches.
Hi thank you for sharing this pattern. I’ve noticed it doesn’t mention where to attach the ears. Can you please explain. Thanks!
Although many of us can adjust the errors in the pattern without help, I think it’s wrong of a designer , who KNOWS there are errors, to not fix them on the page they share the pattern on. We all appreciate free patterns, but to know but not fix something shows that it’s a designer I who I would NEVER buy from.